Thursday, December 29, 2011

12 Days of Christmas: Day 1 - 4

Day 1: Family Photo, but I did the annual Christmas Card

Day 2: Your Christmas Tree

Day 3:  Letter to Santa

Day 4: Christmas Decorations
Big Picture Classes offered a class entitled the 12 Days of Christmas. It began December 14th with a prompt with a photo topic and size suggestion and scrapbook materials suggestion.  You gathered your supplies and photos and placed them in an envelope marked Day 1, Day 2, and so on.  Then on December 25th, your First email with instructions on how to use your supplies to make the LO demonstrated arrived.  Each day a different instructor was responsible for the Christmas LO challenge.  I am inserting Days 1 -4 here.  I will upload the others as time permits, because I have my dad's family coming in to stay during the New Year's Holiday.  I am unsure how many layouts will be accomplished until everyone returns home.

Day 1 Challenge was to take a family photo and scrap it.  Well, we don't take a family pic, but I scrapped the annual Christmas Card and Letter.

Day 2: Was to take a picture of your completed tree and the decorating process.  May Flaum suggested a 2 page LO; so I took her up on the challenge.  I photographed 10 of my 11 trees (forgot the peacock tree).  I have never done this before. I like how it turned out.

Day 3 challenge was to capture your child writing a letter to Santa.  I forced Walker to write his letter.  I believe this might be the last year for a lot of Santa traditions.  I hope not!

Day 4 challenge was to take several pictures of the Christmas decorations in your home.  I was unsure about the suggested picture sizes, but I LOVE how this LO turned out!  I have never really completed a LO just about the decorations!  8 more days to go! I have been able to use up a lot of my Christmas scrapbooking stash.  This has been a wonderful feeling.  (However, I did purchase some Christmas sale items..oops) 

This has been such a fun class!  Merry Christmas! 

4x6 Photo Love: Erie Canal

Left page

Right page

Close up of Title & Journaling
Well, I failed at the Christmas Journal, but I decided to accomplish Shimelle's 4x6 Photo Love in conjunction with Two Peas in a Bucket 4x6 monthly challenge.  November's challenge was to use 11 pictures on one layout.  This was accomplished by inserting a 6x12 photo insert into the middle of a two page layout.  My 6x12 insert did not arrive in time; so I used a 12x12 photo insert w/ 6: 4x6 inserts, which allows a total of 12 photos.  I folded over the right side in order to accomplish the challenge.  There are 4 horizontal 4x6 photos along the bottom of the two page spread, 3 4x6 vertical at the top and 4 4x6 photos in the insert w/ 2 journaling cards.  I always love these challenges because they are so interactive!  Here is my attempt at this month's challenge, which was issued on November 30 and Due today, December 29th.  Nothing like waiting to last moment.  These pictures are from our summer vacation to Buffalo, NY & Canada.  We took an Erie Canal boat ride to view the lock system in action!  It was incredible!  Gates would lock in front of you and open behind you and the water would either flood in or out depending which way you traveled on the Erie Canal!  It is a spectacular feat of engineering!  This was such a fun trip!  We were all amazed by the Erie Canal!

Thursday, December 1, 2011

December 1st

Today is the 1st of December 2011.  I am beginning "Journal Your Christmas"  with Shimelle Laine.  I don't know how often I will finish a 6x6 page, but I hope to write down something about Christmas every day.   And maybe I will post it here.

Sunday, November 13, 2011

Christmas Layout: Shimelle

One of the last challenges Shimelle posted on her Christmas Crafting Weekend was the sketch of the week but with a Christmas twist; make a Christmas themed layout!  Yahoo!  It was fun!  I now have a one page Christmas layout ready to go; just add pictures!  And on top of that, we used one of those pesky framed pieces of Pattern paper!  I never know what to do what those papers!  Aagh!  Well imagine Christmas pictures where these Niagara Falls pictures are located!  All the chipboard embellishments are from Crate Paper!  The framed pattern paper is sassafras!  These are not my typical Christmas colors, but I like the slanted tree against the pics and all the embellishments!  And yes I cut my paper incorrectly; hence the cut and re-tape together on upper left! It's a fun LO!  And this Christmas Crafting Weekend with Shimelle Laine has been incrediblly wonderful!!  Thanks so much Shimelle!

Make a gift tag!: Shimelle


Make a gift tag was the next challenge on Shimelle's Christmas Crafting Weekend!  Well, since many of my presents have to travel/be mailed for Christmas, I really like the old fashioned (1980's) sticker tags!  Peel and stick! Easy Peasy! BUT, I thought, "Tags would make great place setting cards, and if they wanted they could hang on the tree or toss!"  So, I made two place setting cards.  One for my mother and the other for Walker, that way if we decide not to use for place settings designations, then I can stick them on at least one present! Ha! I do plan to tie around the napkins at each place setting.  The glue on the green tag is disappointing!

Make a Tag!: Shimelle

Christmas Crafting Weekend , Shimelle Laine, is a blast!  Another challenge issued this weekend was to Tag it UP!  Make some tags!  Use them as a garland, on scrapbook page or just get crafty and make some!  I made three!  I am happy with how they turned out! I dry embossed, embossed with the heat gun, used ink and some old Christmas papers.  In addition, I used stickles on a "tag" I cut from a larger 12x12 piece of paper.  I also added some ribbon and flower embellishments!  Since I am happy with how they turned out, I plan to send to my ScrapHappy friends these 3 tags for our Holiday Tag Swap!  I hope they like them!

Round Center Card: Shimelle


Shimelle's next challenge on her Christmas Crafting Weekend blog was to create either a card or scrapbook page with a circle image as the center.  I chose to make a card and I went simple!  i used a giant chipboard embellishment "Ornament" as my center.  The holly pattern paper is so old, I have no idea who makes it.  I plan to add the sentiment "May your holly-days be Merry and Bright!"  I hope this meets the challenge.  I like the simplicity of it!  Love using up the scraps! 

Make a Pocket!: Shimelle

Shimelle's next challenge in her Christmas Crafting Weekend was to make a Christmas page with a pocket on it.  She gave us three examples.  So, the idea of actually making a 6x6 Christmas journal was sealed with this challenge.  I used BoBunny Christmas paper from days of gone as the 6x6 base and used a BoBunny sticker (from the same collection) as the pocket.  I adhered the sticker to white cardstock.  I think placed adhesive around the edge of the cardstock sticker to create the pocket.  I used a small lime green rectangle of cardstock for future journaling.  I placed another Bo bunny sticker to the top of the journal tag.  Positive is that the Bo bunny paper is double sided and I can use the other side of this for another journal day.

Create an embellishment from paper: Shimelle

Shimelle's Christmas Crafting Weekend has been a lot of fun!  The next challenge was to create an embellishment from an image you cut from a larger patterned paper.  The poinsettia card which was demonstrated was awesome!  My take on the challenge was to cut out some ornaments from a scrap 12x12 page of ornaments in a row.  I am loving that I am using up some old Christmas paper, embellishments and ribbon!  Here is my Make Your Own Embellishment card!  The paper is BoBunny, including the cut out ornaments (i think)  the Season's Greetings tag was a sticker (Creative Imaginations; Signature Collection) that I backed with cardstock and tied w/ red sheer ribbon.    I used a rub on "Happy holidays" (Little yellow bicycle) on the inside of the card.

Make A Banner/Garland: Shimelle


The next challenge in Shimelle's Christmas Crafting Weekend was to make a banner or garland.  Shimelle showed us some spectacular examples for the creating  a holiday garland made out of package tags which could hang anywhere in your home.  However, the Journal Your Christmas an online class with Shimelle has really taken hold in my head.  On the previous post, I found an album, 6x6 Christmas paper pack (Cosmo Cricket's Jolly by Golly) and 30 of the 36 page protectors I need to participate.  When I started thinking about this challenge, I knew that a tag garland is just not my type of home decor, but I loved the idea (which the first person who posted to this challenge gave me) was to create a garland on a scrapbook page.  So, I made the first page to my Journal Your Christmas album.  I already had a precut white glitter 6x6 page; so, I cut out a bunch of triangle from Christmas paper scraps (mostly Flair by Design & Bo Bunny) to make the "banner", used black glitter letters (memory makers) and fiber from Basic Grey to create the "rope".  I did include an epoxy Christmas tree eyelet (Making Memories) on the banner.  It is simple and to the point "Days of Christmas '11".  Here is my front title page for my Christmas Journal.

Show us your album: Shimelle


Shimelle's Christmas Crafting Weekend  is also to kick start her Journal Your Christmas class  For 36 days Shimelle is going to send you a photo and journal prompt regarding Christmas activities and traditions.  I have to say that the class sounds like a lot of fun and somewhat attainable.  I am very reluctant to start any type of crafting project during the month of December, especially since I am EXTREMELY behind in decorating my house for Christmas.  Yes!  I usually start before Halloween with the prep work.  This weekend I usually have my 100+ lighted village up and I am wrapping up all my 12 themed trees.  The weekend before Thanksgiving is dedicated to the additional decorations and the 12' family tree in the living room.  NOTHING is turned on until after Thanksgiving.  All outside decorations are put up the weekend after Thanksgiving Thursday.  Then I am done and I can enjoy the month of December with its endless parties, tv specials and travel.  NONE of the decorating is done and instead I am preparing for Christmas by contemplating having a Christmas Journal and playing along with Shimelle in December!   So,  I was going to skip this challenge, but then I found a 6x6 RED album with 30 page protectors and a Christmas paper pad of 36 6x6 papers!  I thought WOW! it's done for me.  So, I trimmed all the papers of their connector strip, reviewed Shimelle's 10 Things Blog post and I think I am going to have 1 6x6 photo next to one of the Christmas 6x6 PP, but then the other challenges came out and now I am unsure as to my plan.  But here is my Christmas 6x6 album/journal and all the papers in their 6x6 page protectors. I will still need to purchase 6 6x6 page protectors.

What will You Weave: Shimelle

Friday kicked off Shimelle's Shimelle's Christmas Crafting Weekend on her blog.  The first challenge issued was to create "woven" project.  The example shown was a Christmas Card!  Since it has been 6 weeks since I have scrapbooked and in my nature, I followed the example!  I absolutely love how this turned out.  The only issue is I forgot to measure my envelopes; so some of my cards are a bit  too big.  Oh Well, I will find something.  I used all of my Christmas paper scraps to make this card and Memory Makers Stamps for Joy & Ho HO HO blocks.  I had fun embossing.  Embossing is still pretty new to me; so I may have gone a bit overboard.Ha!  I also embossed a few snowflakes inside the card.  I did not put any sentiment inside.  I am unsure as to who will receive this card.   Here is my take on Challenge #1:  Weave.

Saturday, November 12, 2011

Christmas Project from the Past

Shimelle Laine is having Christmas Crafting Weekend  and today's first prompt was to post a picture of  a Christmas Project from the Past!  I chose a two page Christmas page about all the events that happen during the month of December.  I believe I got this idea from Creative Keepsakes magazine in 1996.  I still love this layout and try to "reinvent it" each year.  

Shame on Me!!!

Wow!  It has been 6 weeks since I posted or uploaded any projects to my blog! Shame on Me!  I started a new position with my son's school St. Joseph Catholic Schools as Development Director.  I have learned a lot more about facebook. In addition, I have been writing a lot more press releases and taking pictures of the school activities plus starting an Annual Fund Campaign and resurrecting the Capital Campaign.  Whew!  I have just forgiven myself for not blogging or creating!  I have been creating in my new position and it has been just as rewarding!
Christmas Decorations are being decreased this year because of our 8 month old Blood Hound Puppy!  She is just too big, too rambunctious and just plain "bad" for me to risk putting out my village this year.  I am afraid she will destroy the main square of the North Pole Village with one swipe of her 2 foot long, 3 inch diameter whip, we call a tail! Also, with my new job, my energy has been focused on learning the ropes!  So, I am glad I have made the decision not decorate to the extent I normally do.  And that means this weekend, I am going to make my 3 tags for ScrapHappy and participate in Shimelle's Christmas Crafting Weekend!!!   I can't wait to see what I make!  Let's get started!

Saturday, October 1, 2011

Double Take Week 2 Sketch 3 Grilled Cheese

I love these pictures of Walker making his first grilled cheese by his own hands!  I love his Mamarazzi faces in the middle pictures.  I am also submitting this layout for the first day of Informal LOAD.  Patterned Paper and stickers are from Flair Design.  I loved their themed papers and embellishments.  For a sketch girl, they were great because they had sketches on the back of their patterned paper of how to use their materials! 

Friday, September 30, 2011

Ella's Boot Camp Drill #10 Inspiration


Ella Publishing's Boot Camp Drill #10 was to create a layout based on a magazine ad.  I found this drill the MOST DIFFICULT!!!  But I trudged through and gave it a try.  Instead of focusing on trying to mimic the style of the ad, I focused on the colors + a few style elements.  First, I don 't look at too many magazines.  I happen to have this Southern Living magazine laying around; so, I chose this page for its COLORS.  Her turquoise dress against the brownish red brick, brown dress behind her and the dark green of the bushes and grass are what inspired me to chose photos and paper to coordinate.  I also like the puffy white letters of the title in the add.  I tried to mimic.  In addition, I added a blue green striped layer at the bottom to resemble the grass. Unfortunately, I ordered a clear pen vs a white pen; so, my journaling was done in white.  Not the best layout, nor do I think I will use this drill very often (my mind doesn't think this way). 

Thursday, September 29, 2011

Ella's Boot Camp Drill #12 Brightening Eyes

Ella Publishing's Last Boot Camp Drill #12 was a photoshop tip on brightening eyes in a photo.  I may have overdone it a bit, but with practice I really think this tip will come in handy.  Picture of me & Billie at her shower.  Removed red eye and brightened our eyes and teeth.  Before and after pictures.
Before

After

Wednesday, September 28, 2011

Ella's Boot Camp Drill #11 (Embossing/Resist) & Double Take Wk1 Sk3

First, I have to say, "I can't believe LOAD is completed!"  I am in shock; so it is a good thing I have a few Ella's Boot Camp Drills to complete and 4 FABULOUS weeks of Double Take with Nic Howard & May Flaum!  So excited.  Today I combined Drill #11 Embossing and Resist Technique and Double Take's Week 1 Sketch 3 into one layout.  It is about our 2 different snow days in 2011, specifically: 1/9/11 & 2/9/11.  Most of these pictures are from 1/9/11.  Embossing/Resist Technique.  The red embossed snowflake paper inspired me.  Unfortunately, I still need LOTS of practice.  I took a piece of white cardstock and stamped a snowflake image all over it.  I used Dazzle Versamark ink to create the embossed snowflake.  I used clear embossing powder (because that is all I have).  I do think white embossing powder would work better.  I embossed snowflakes on the white background cardstock and a strip of white cardstock to use for the title letters "Snow Daze".  (The title I owe a thanks to a fellow classmate in double take)  For the title letters, I inked them with vintage photo & red brick distress inks by Tim Holtz.  I sprayed Maya Roads, Maya Mist "white" spray paint on the edges of the white snowflake background cardstock.  Again, I think the snowflakes would have stood out better if I would have used white embossing powder rather than clear.  I used the leftover "handmade created" title paper for "accents".  I punched a double loop border, using Martha Stewarts' around the page punches.  I tucked in these accents primarily on the left page.  I was also SO HAPPY to use a Prima Silver Poinsettia on the right hand of the page!!  I have had these and never used them!  Also the paper is SEI "Alpine Forest".  I only used 3 sheets of PP, with several pieces left over.  The sketch used a lot more layering than I have been doing lately, which took me a bit longer to create.  But I LOVE how it turned out!  Double Take is taking me into that creative mode, trying new and old/unused techniques, such as embossing, inking, more embellishments, punching and layering!  I am truly happy to "jazz" up my pages a bit more since LOAD, even if this layout took me two days.  Off to another drill and another sketch!


Monday, September 26, 2011

LOAD: Day 26 Double Take Wk1 Sketch2

I can't believe it!  Today is the LAST DAY OF MOTHERLOAD!!!!!! Whoohoo!!! 26 layouts in 26 days!!!  A total of 43 layouts over the course of 13 weeks!  I am quite proud of myself.  I followed all but one prompt I do believe, even if the prompt was not followed until a few days later!  I will miss Laine Ehman's daily emails challenging me to try something new and different or old and forgotten!  The LAST LOAD prompt was to "SCRAP" whatever you wanted!  Just do it!  So, guilt free, I chose to use Week 1 Sketch 2 of Double Take!  Love this sketch!  It is certainly going to be one of my "go-to sketches"!!  These are the last pictures of Walker's Magic Show.  The picture in the lower left hand corner is of the actual magician's class Walker attended.  Here it is, the last LOAD page:

Sunday, September 25, 2011

LOAD: Day 25 Scraplift, Ella Boot Camp Drill # 9

          Today's LOAD challenge was to scraplift a picture, LO, theme, idea from a previous LOAD layout.  I chose to scraplift the self portrait taken during LOAD basic training.  I incorporated the picture with Ella Publishing's Boot Camp Drill #9: Guiding Principles Quiz.  The drill taught by Angie Lucas, encouraged us to use a quiz helping us define our guiding principles for life.  I completely scraplifted her layout design by placing my words of wisdom on the right and used up some "L's" from my letters stash.  I am not happy with the self adhesive clear paper I used for the journaling, but it is done!  Here is my interpretation of both challenges.

LOAD: Day 24 Lyrics; Double Take Wk1 Sketch 1

Not sure why I didn't post yesterday's  LOAD and Double Take class layout, but here it is.  The LOAD challenge for the day was to use a song title or lyrics as the title on a layout.  I was not inspired to use the prompt.  WHAT I really wanted to work on one of the four sketches for the first week of DOUBLE TAKE with Nic Howard and May Flaum at Big Picture Classes .  Therefore, I completed the first out of four sketches for the week as my daily LOAD challenge. Double Take class has TWO fantastic instructors, 4 sketches, 2 examples per sketch each week for 4 weeks!  It is not too late to join us!  Click on Big Picture Classes above to learn more about the class and register.  Go for it!

Only three more days left of LOAD!  The pictures of Walker on the layout are him performing his Magic show which he learned from Landon Stark's Magic class earlier that day.  He was very intent on performing the magic tricks "just so".   The journaling reads "Magician at Work"  "Walker attended a "magical workshop" taught by Landon Stark, a professional magician.  When we got home, he performed a show for us.  Mae Mae was his "assistant".  he was very enthusiastic about his performance - very unusual (for Walker).  Performing trick after trick - I clapped and snapped (photos) eagerly."

Saturday, September 24, 2011

ScrapHappy Informal LOAD Blog Hop

Welcome to my blog.  If you participating in the ScrapHappy Informal October LOAD, you should have come from christie.   If not, go lisa hausmann to start the official "unofficial LOAD blog hop".  I am fairly new to blogging, so I have just the basics here.  I wanted to participate in this informal LOAD blog hop because as a newbie to LOAD, last month (I participated in MotherLOAD at Big Picture Classes), I was grateful to the previous blog hop discussing how to prepare for LOAD.  First and foremost, just enjoy the process!  HAVE FUN!!!  It is not to be a stressful event; it is a time for you capture memories on paper! Feel free to look through my blog during the month of September at some of the layouts I made.  Most were made using the prompts, I love lists, so here is my list of "how to prepare" for LOAD.

1.  Get your basics together: glue/tape, cardstock (your favorite and basic colors), BLACK letters (they go with every layout for a quick title), little letters (quick way to create a title without overpowering your page), cutter blades, glue dots, glue lines.  Whatever your go-to scrap items are, have extras on hand.  (This is very important for me because I live in a rural area; so it is a 2 hour drive to a commercial store or on-line ordering for boutique items with wait time for shipping for my favorite tape.)

2.  Get Organized.  I thought I was, but I was not!  Consider organizing your papers, embellishments, etc. by color.  stacy julian has some fun videos regarding this type of organization. I have all my embellishments on magnetic and/or peg boards.  Embellishments are organized by type and then color. My ribbons are organized by color in jars on a shelf.  I finally organized my pattern paper by color. I also broke down and sorted "used" kits into color.  If I used the kit, I then put the embellishments with like embellishments and filed the pattern paper by color.  I also cleaned my space very well. I pulled everything out, cleaned (including the baseboards), purged untouched supplies and sorted by type and color.  The one exception is I do have pattern papers and embellishments also sorted by events/holidays.  I have hanging file folders; so I have an orange folder for Halloween, red folder for Christmas, blue for sports, etc.  I also created special themed folders for pictures I knew I would scrap.  For example, I have a travel folder with themed papers, some embellishments, etc.  There are all kinds of books, blogs, etc on how to organize. I am visual person, so I viewed Stacy Julian's color videos, Let's Scrap Scrabook Room Forum with tons of pictures of "scrap spaces", Paperclipping Roundtable's organization podcast, Getting it all together PRT 053 and Organization on the Move PRT 081, and don't forget to check out Lain Ehman's site.  Then, I just did what worked for me.  (NOTE:  I did this cleaning spree and reorganization the day before I started LOAD, so it is still possible.  I needed a clean space.  I will say I did have a plan prior to cleaning.)

3.  Print Pictures.  To me this is part of getting organized.  Organize those digital photos, upload to printing service and ORDER those pictures.  Get them ALL before you start!  I typically print photos at home, but I did not know what the prompts would suggest and I wanted to be ready for any type of challenge!  Organizing, uploading and printing pictures is my least favorite scrapping activity.  It did not take a lot of time cropping or editing the photos.  I just printed the pictures I wanted in 4x6 and a few favorites in 5x7.  I made a conscience decision to scrap 4x6 photos or crop them by hand to meet my daily prompt needs.  I did take the time to make sure all the printed photos (I had about 300) were sorted and labeled (event and date) on outside of packet.  This made choosing a photo for the daily challenge easy and creating a layout faster.

 (Below are my go-to scrapping needs. They be of help or not.)

4.  Sketches and/or Inspiration:  I love a sketch and/or challenge!  This is my #1 GO-TO item to start a layout! I made sure I had sketches printed for easy referral.  I also collected and printed all the unaccomplished layouts/challenges/lessons from previous scrapbooking classes.  This was helpful.  It kept me off the internet surfing for inspiration, which would have cost ME valuable time.

5.  Pre-Made Kits:  I LOVE KITS!  I have all sorts of kits.  Kits with matching papers and embellishments,  sometimes with and without a suggested layout example.  I also have beautiful kits with papers and embellishments with directions on how to create the layout EXACTLY like the picture!  Of course, the layouts never look exactly like the picture because I have to tweak it, but the point is, sometimes I need to be able to QUICKLY assemble a layout, put my pictures on it and call it a day.  Another approach is create your own kits, which I did too, pull papers, embellishments, journaling tags, ribbons, etc all together and put into a file folder/page protector ready to use!  Cuts down on the decision time!

6.  Photos To Scrap List:  As silly as it sounds, I have a list of events/theme to scrap. It truly helps me focus.  With 300 photos staring at me, I quickly become overwhelmed.  Plus it is always fun to scratch an event/theme off the list once I have scrapped it!  (Again, my go-to item.  You may find this very restricting and uncreative.)

I do believe I am the last on the blog hop list.  I hope the information helps.  Have fun and enjoy LOAD! See you on the boards!

P.S.  I was so excited before starting my first LOAD that the "Eve of the night before LOAD", I wrote a little poem.  If you want a little chuckle, go here  Twas the Night Before LOAD.
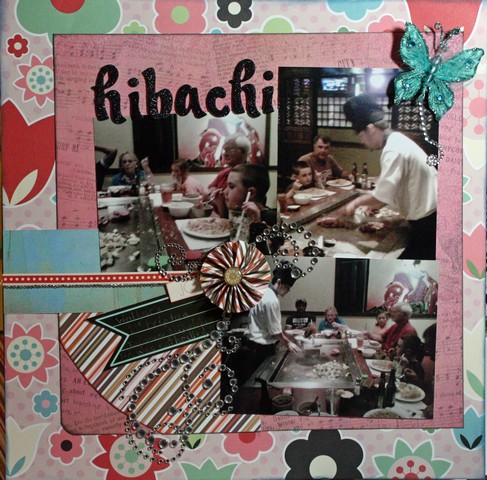
The layout above has the poem with pictures of my scraproom on it.  The layout was based on a prompt received during LOAD.


Here is the official list of Blog Hoppers:
Lisa:                        http://lisahausmann.blogspot.com
Katherine:            http://www.csmoferret.blogspot.com
Tambur:               http://myhearties.blogspot.com
Pam:                       http://dailypamage.blogspot.com
Katrina:                http://k84mansramblings.blogspot.com
Lynette
Christie
Lisa M.:            http://lisamzepponi.blogspot.com

Happy Scrapping
Lisa M. Zepponi

Friday, September 23, 2011

LOAD: Day 23 Say it with Numbers

      Today's LOAD challenge was to "Say it with Numbers".  I followed Lain's example and scrapped about the numbers I live by during the day with a twist.  I scrapped my schedule when I was Vice President/West Campus Services next to my schedule now as a stay at home mom.  Big difference.  I chose black & white with no picture, because it is as simple as that, it is black and white:  Life with a job and life without a job.  Here it is.  LMZ

Ella's Boot Camp Drill #6 Grid Design

Ella Publishing's Boot Camp Drill #6 with Lisa Dickinson taught us about design using grids in three different ways.  I chose:  Use a grid as the background and place a picture over grid.  I used a picture of Jill Mutz, my aunt with Walker's baseball helmet on, bat in one hand and Oscar the puppy in the other!  The "Oldest t-baller".  It was fun!  Plus I got to use up some random embellishments and scraps!  Love it!

I also used PSE to darken up the picture because it was too light; however it looks as if I went too dark.  This is a technique I learned by Maggie Holmes.  Obviously, I didn't listen very well!

Thursday, September 22, 2011

Ella's Boot Camp Drill #8 Urban Effect

Tonight's, Boot Camp, drill was to use the "urban effect" on a photo.  I applied it to the picture of Walker dressed up for spirit week's "Giddy UP" day.  I don't think I will use this effect to often.
Original
Urban Effect

Ella's Boot Camp Drill #5: Frustrated Independence


Ella Publishing's Boot Camp Drill #5 was to use connective journaling.  I am not even going to try to explain what connective journaling is because I am not sure if I got it.  However, I used some pictures of Walker at 3 1/2 trying to open a bottle of coke and becoming so frustrated doing while trying to accomplish his task. My connective journaling is "Walker is too much like me!"  Losing it when he can't accomplish something he thinks he should be able to perform by himself!  Frustrated Independence!

LOAD: Day 22 Scrap an "End": Ella Boot Camp Drill #7 Stamping w/ Words

Today's LOAD challenge was to scrap something came to an end.  The end of an era, journey, task, etc.  At first, I thought I would not follow the prompt, because I could not think of anything that had come to an end that wasn't extremely sad or frustrating. That is until, I looked through the wonderful Big Picture Gallery and I found a layout of someone's children who had fallen asleep at the end of dinner at the table!  Too Cute!  Then I thought of ALL those holiday pictures to Niagara Falls and BAM!!!  The last page of my travel album was born!  Thanks Laine! I began with Prima Marketing's Road Trip Collection, "Twists & Turns" entire page.  I did cut the bottom off and used a piece of blue "graphed" paper from the same line to create my subtitle "Memories to remember".  I also decided that this was the perfect layout to incorporate Ella Publishing's Boot Camp Drill #7, stamping with words.  I stamped the title "An Adventure Begins" and the subtitle, Memories to Remember.  My word stamp (my entire stamp) arsenal is limited and old.  And my technique is rough; hence why you see part of the square of the actual block stamp.  But I do like how this layout turned out;  I don't think I would have ever thought of the theme nor used stamps to create the title!  Thanks Laine & Nichol, respectively!

Wednesday, September 21, 2011

Birthday Card Stamped with markers

Jennifer McGuire challenged us to use something besides inks to color our stamps.  I used markers to ink up the birthday cake of this stamped Birthday Card.  Here is my example.

LOAD: Day 21 Cut a picture into a Shape


Today's LOAD challenge was to cut your picture into a shape.  So, I broke out the old Creative Memories shape cutters and cut a picture of Walker in his All Star baseball uniform into a "rounded" star.  This was never my favorite shape cutter, but it fit the theme of the layout!  I also participated in a Let's Scrap challenge to use 3 different pieces of chipboard and alter them.  I covered the upper right star with silver foil, painted the journal chipboard with khaki paint and stickled the arrow red.  I used up some old baseball themed paper and material.  I love these pictures of Walker and his team in the dug out focused on their fellow team mate up to bat!
      Here is my Day 21 Layout:  ALL STAR!

Tuesday, September 20, 2011

LOAD: Day 20 & Ella Publishing Drill #3


Today's LOAD challenge was to use an action shot you took during training (or any picture you took during training as part of the homework assignments).  The bottom picture is a photo of my scraproom, which was part of our training homework assignments. The picture of above is a candid of me, which my son took while I was sitting at the computer in my scrap room.  I wanted to highlight a little poem I wrote the eve of the eve of LOAD.  The poem can be read in its entirety by clicking on this link Twas The Night Before LOAD .  The names of the scrappers are of a small "accountability group" within MotherLOAD.  I have been waiting all month to scrap this poem with a picture of my scrap room;  today's prompt was the calling! I have had a blast during LOAD!!  I have also incorporated Ella Publishing's Boot Camp Drill #3, stamp a background by Nichol Magorik and Jennifer McGuire's Inspiration lesson of using distress inks.  I stamped the entire "pattern paper" background using Tim Holtz' Distress Inks (Fired Brick, Faded Jeans, Walnut Stain & Spiced Marmalade: my only colors of ink) on multi patterned Inkadinkado stamp.  I placed all four colors of ink on the stamp, misted it with water and randomly stamped a white piece of cardstock, creating a "patterned paper" background. In addition, I used spiced marmalade & fired brick on a dot stamp.  Using the dot stamp, I stamped watercolor paper, misted and cut out the title LOAD using my Cricut.  I matted the title in black cardstock. Last, I used stickles on the dots in the title, making them sparkle.  I tried to pull out the stamped butterfly by including glittered butterflies on the page.   I matted the poem and pictures in Bazzill Bling Cardstock.  I kind of like the look.  I need to procure some new stamps to make this "stamped background" look even better.  I had fun making this layout.   Thanks for looking!

Ella's Boot Camp Drill #4

Yes, I skipped Drill #3 of Ella Publishing's Boot Camp 2011.  It is coming soon.  I have not finished the LO.  Tonight's drill was a Photoshop Elements or photo editing drill!  Loved IT!  Immediately applied to the skating pictures of Walker, from classmate's birthday party.  The rink was dark, black light was in action!  So, my pictures were less than desirable.   PLUS, I was on skates!  The new photo editing techniques certainly improved the photo! I can actually see my child, in the blue shirt, skating towards me! 


After PSE
Before PSE

LOAD: Day 20 & Ella Boot Camp: Drill #2


Today's LOAD challenge was to scrap the "action" photo or any photo we took during basic training.  I am hoping to accomplish that today, too but this layout is based on Ella's Publishing Boot Camp's Day #1, Drill #2 (night drill): Use pattern paper.  I chose a bold pattern, a geometric pattern and solid. The funny thing is I really thought I was choosing a bold statement pattern and adding coordinating patters to complement it.  The drill was to focus on how to use pattern papers, how to mix and match pattern papers.  I also focused on one of last week's LOAD challenges, use a bad photo.  These photos were taken last year on my blackberry. The lighting was bad and the chef's movements were fast! Hence the not-so-good photos.  I also included one of the embossed accordian fold flowers from Jennifer McGuire's Inspiration class. Walker had a blast during his first trip to the Hibachi Grill!  I loved seeing his face light up when the chef gave us an extraordinary display of dexterity.  PLUS, I really liked using all these pink papers on this layout to capture the pink tint in the pictures. I don't normally get to use pink on LOs with Walker. The pictures are from summer 2010.


Monday, September 19, 2011

LOAD: Day 19 Scrap Out of Order & Ella's Boot Camp Drill #1

Today's LOAD challenge was to scrap out of chronological order.  It was also the first day of Ella's Boot Camp.  Boot Camp lesson was "no-grammar" journaling.  Document something in a pie chart, or comparison of two people on your LO.  I chose to document our daily schedule in a pie chart:  20% sleeping, 30% working or being educated, 15% sports, 15% either hunting (for the boys) or scrapbooking (for me), 10% fighting over homework, 5% watching Netflix streaming Hercules while playing with Daisy Dawg and 5% Deciding what to eat and then either going to get it or popping it in the microwave!  It was a fun challenge!  I also included some last week LOAD challenges, scrap a picture I have already used on a LO, stamp on your LO (row of flowers, title and flower embellishment), scrap something difficult (our daily routine).  I also used a new technique learned in Jennifer McGuire's Inspiration workshop; embossing and using distress inks on watercolor paper.  The embossed/watercolored flower (top left) is my attempt.  Here is our daily schedule layout!

Sunday, September 18, 2011

LOAD: Day 18 Color Inpsiration

Today's LOAD challenge was to use the following color inspiration.


I think I somewhat accomplished the challenge, but more importantly I created a layout NOT from a "make and style" kit.  I did scraplift the topic and design layout from an American Crafts' designer team member, Revilie Schuit, who posted a similar layout on their blog hop! Click here to see her layout.  Revlie Schuit Thanks!  You inspired me to get my mojo on again!  Here is my layout.